Introduction
This guide will walk you through creating a custom tool in Flowise (Version 2.0) to add items to a Google spreadsheet via a chatbot. The process is split into two parts:
- Creating the Custom Tool: This tool will add items to a to-do list.
- Integrating with Google Sheets via Make.com: We will link the tool to Google Sheets so that to-do items are automatically added to the spreadsheet.
Part 1: Creating the Custom Tool in Flowwise

1st Step: Set Up the Chat Flow
- Open Flowwise and create a new chat flow.
- Save the chat flow and name it, e.g., “Custom Tool Demo”
- Add Nodes:
- Go to Nodes > Agents and add the xxxOpenAI function agentxxx / Tool Agent to the canvas.
- Go to Nodes > Chat Models and add the OpenAI chat model or other compatible chat model to the canvas.
- Connect the chat model to the agent.
- Select your credentials and set the model to GPT-3.5 Turbo with a temperature of 0.7.
- Add Memory:
- Go to Nodes > Memory and add the Buffer Memory node to the canvas.
- Connect the memory node to the agent.
- Add Custom Tools:
- Go to Nodes > Tools and add the Custom Tool node to the canvas.
- Connect the Custom Tool to the agent.
- You can add multiple custom tools if needed, but we’ll use just one for this demo.
2nd Step: Create the Custom Tool
- Create a New Tool:
- You can do this directly from the canvas or by returning to the Flowwise dashboard and selecting Tools > Create.
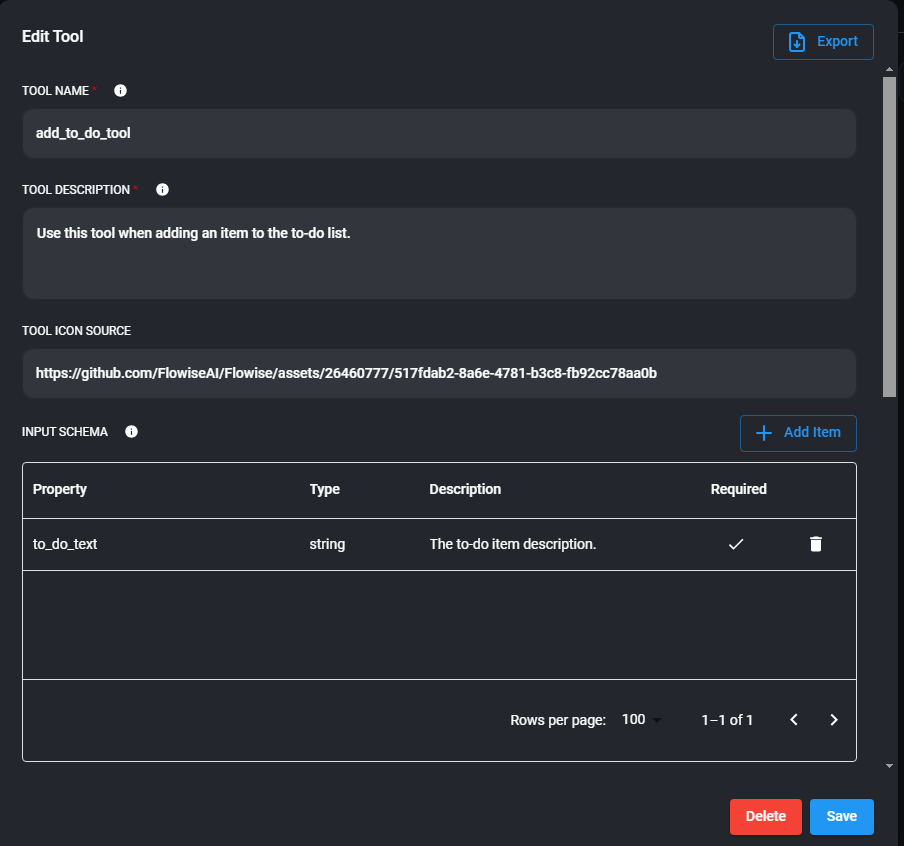
- Name and Describe the Tool:
- Name: Add a unique name, e.g., “add_to_do_tool,” following the naming convention (lowercase, underscores for spaces).
- Description: Add a detailed description, e.g., “Use this tool when adding an item to the to-do list.”
- Define Output Schema:
- Add a new property called
to_do_text. - Set the type to
string. - Provide a description, e.g., “The to-do item description.”
- Mark the property as required.
- Add a new property called
- Write JavaScript Logic:
- Clear the sample code.
- Add a return statement to return a message like
"item added successfully"after the logic executes. - Save the tool by clicking on “Add.”
Step 3: Integrate the Custom Tool into the Chat Flow
- Go back to your chat flow.
- In the Custom Tool node, select the newly created tool from the dropdown.
- Save the chat flow.
- Test the Tool:
- Open the chat and type a command like “Add ‘buy milk’ to the to-do list.”
- Verify that the bot responds with the correct message and that the input is processed correctly.
Part 2: Integrating with Google Sheets via Make.com
1st Step: Create a Google Spreadsheet
- Log in to Google Sheets and create a new spreadsheet.
- Name it, e.g., “To-Do List”
- Add a title for the first column, e.g., “To-Do Items” and format it as bold.
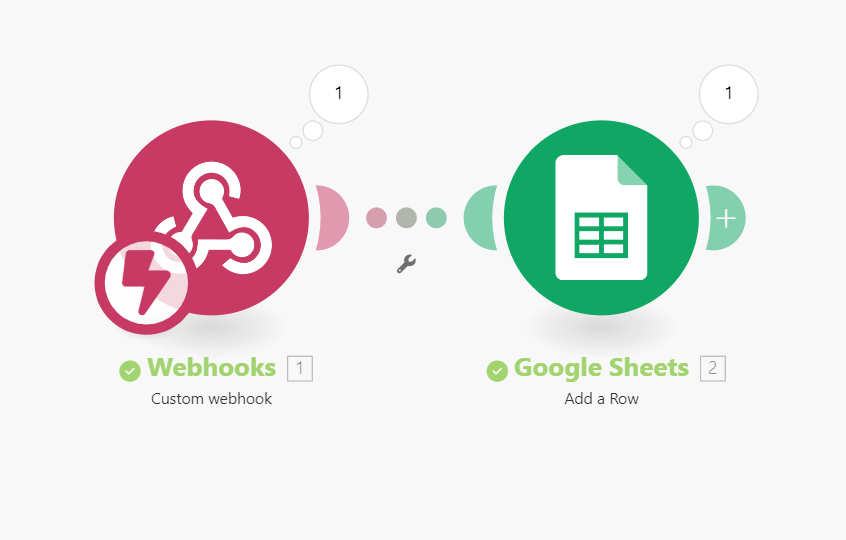
2nd Step: Set Up Make.com Integration
- Sign Up for a free account at Make.com.
- Create a New Scenario:
- Go to Scenarios and select Create New Scenario.
- Use a Template to speed up the process. Search for a webhook that adds items to Google Sheets.
- Configure the Webhook:
- Name the webhook, e.g., “Flowise AI”
- Copy the API endpoint provided by Make.com.
- Test the Webhook Using Postman:
- Open Postman, set the method to POST, and paste the API endpoint.
- In the Body tab, select raw JSON and enter a test value, e.g.,
{"to_do_text": "sample text"}. - Click Send and ensure you get a response of “Accepted.”
- Link to Google Spreadsheet:
- In Make.com, link the webhook to your Google Sheet.
- Map the
to_do_textproperty to the correct column in your spreadsheet. - Save the scenario and toggle it on.
Step 3: Finalize and Test the Custom Tool
- Modify the Tool Code in Flowwise:
- Go back to Flowwise, open the add_to_do_tool, and replace the placeholder URL with the webhook URL from Make.com.
- Update the code to send the
to_do_textproperty to the webhook. - The sample code is as shown below:
/*
* You can use any libraries imported in Flowise
* You can use properties specified in Input Schema as variables. Ex: Property = userid, Variable = $userid
* You can get default flow config: $flow.sessionId, $flow.chatId, $flow.chatflowId, $flow.input, $flow.state
* You can get custom variables: $vars.<variable-name>
* Must return a string value at the end of function
*/
const fetch = require('node-fetch');
const webhookUrl = 'https://hook.eu1.make.com/abcdef';
const body = {
	"to_do_text": $to_do_text
};
const options = {
    method: 'POST',
    headers: {
        'Content-Type': 'application/json'
    },
    body: JSON.stringify(body)
};
try {
    const response = await fetch(webhookUrl, options);
    const text = await response.text();
    return text;
} catch (error) {
    console.error(error);
    return '';
}
2. Restart Flowwise to apply changes.
3. Test the Complete Setup:
- Ask the chatbot to add an item to the to-do list.
- Verify that the item appears in your Google spreadsheet.
Conclusion
You have now created a custom tool in Flowwise that can add items to a Google Spreadsheet via a chatbot interaction. This process can be expanded to create more complex integrations and automate various tasks.